This article explains how concepts from Trackingmore work in Rush, how you can easily get started with shipments, and what to set up first.
Switching to Trackingmore from Rush is easy. With a simple setup, you’ll be up and running in no time.
Step 1: Sync all your orders shipments for the last 30 or 60 days.
Be mindful to not turn any notification if you are syncing for a longer time period, as notifications generated for older shipments maybe be not relevant to your customers anymore.
Once you install Rush, we will automatically sync all orders for the last 7 days without taking them from your shipment plan quota.
However, you can sync up to 15, 30, 45 60 days backward on demand. Our suggestion is based on your average delivery time pick the interval that is most appropriate. If you are not sure, just pick the longest :)
To do that, by going to the Shipments tab and opening the import modal:
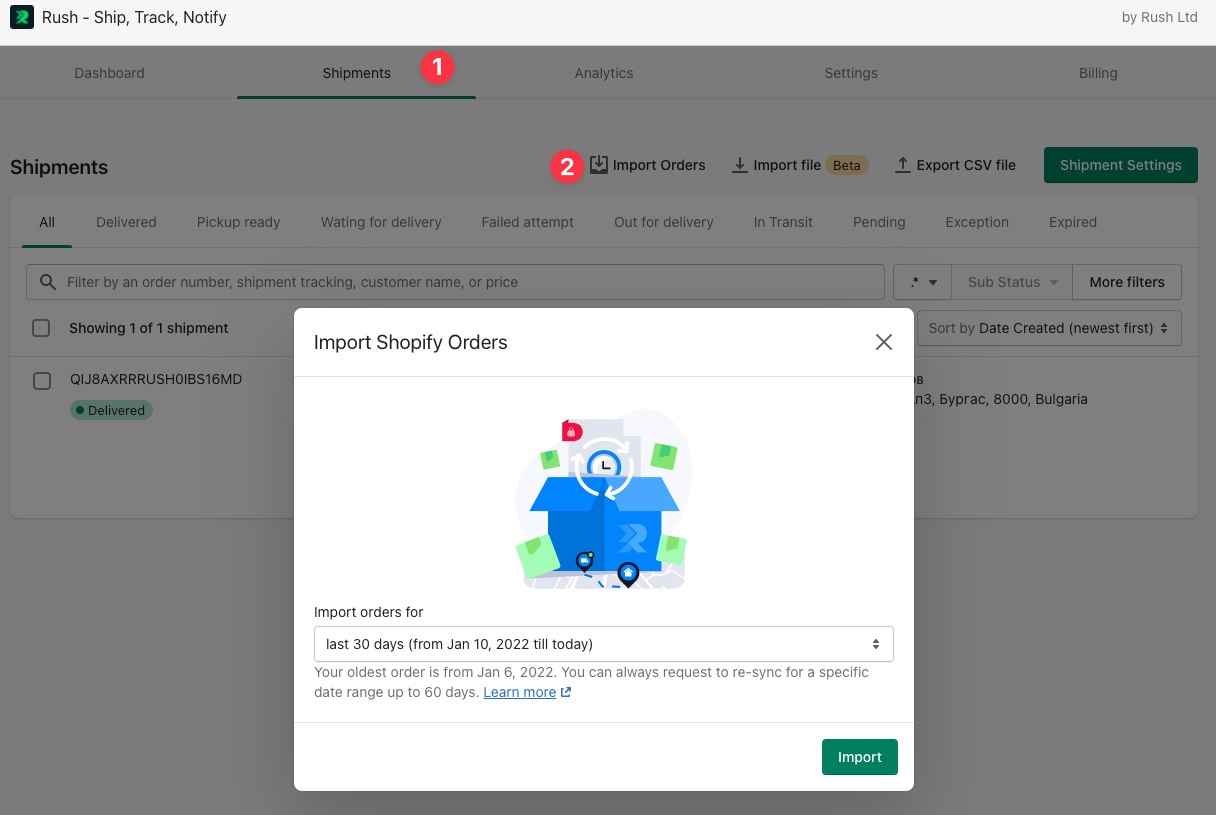
Pick the date range from the dropdown menu and you are done, now wait for all your orders and shipments to be processed. (Read more here Import orders modal).
Be mindful that if you are free to plan after your limit of shipments, we will pull all shipments data, but we will not synchronize them until you have a free quote for those. In this case either upgrade plan or increase charge limit.
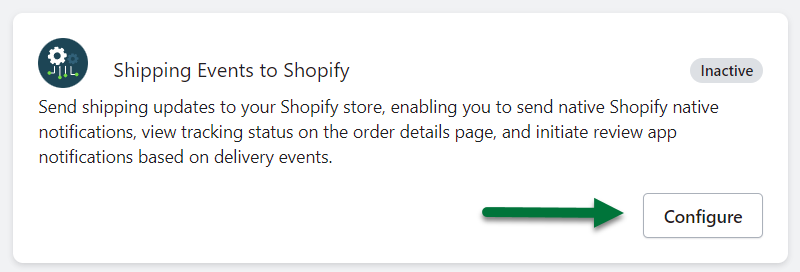
Step 2: What to keep all Shopify notifications currently working?
Rush can trigger Shopify default emails the same way Trackingmore is doing it. You need to turn on Send shipping tracking events to Shopify from the Settings tab:
You can learn more about them here XXXX
and do not forget to change your links in emails!!!

Learn more about how to do this here: update tracking link in Shopify emails.
With those 2 steps - you are done and ready to continue sending all Shopify events.